Category: Blog

Stricter JSON parsing with Haskell and Aeson

I’ve been having fun recently, writing a RESTful service using Haskell and Servant. I did run into a problem that I couldn’t easily find a solution to on the magical bounty of knowledge that is the Internet, so I thought I’d share my findings and solution.

While writing this service (and practically any Haskell code), step 1 is of course defining our core types. Our REST endpoint is basically a CRUD app which exchanges these with the outside world as JSON objects. Doing this is delightfully simple:

That’s all it takes to get the basic type up with free serialization using Aeson and Haskell Generics. This is followed by a few more lines to hook up GET and POST handlers, we instantiate the server using warp, and we’re good to go. All standard stuff, right out of the Servant tutorial.

The POST request accepts a new object in the form of a JSON object, which is then used to create the corresponding object on the server. Standard operating procedure again, as far as RESTful APIs go.

The nice part about doing it like this is that the input is automatically validated based on types. So input like:

will result in:

Error in $: expected String, encountered Number

However, as this nice tour of how Aeson works demonstrate, if the input has keys that we don’t recognise, no error will be raised:

This behaviour would not be undesirable in use-cases such as mine — if the client is sending fields we don’t understand, I’d like for the server to signal an error so the underlying problem can be caught early.

As it turns out, making the JSON parsing stricter and catch missing fields is just a little more involved. I didn’t find how this could be done in a single place on the Internet, so here’s the best I could do:

The idea is quite straightforward, and likely very easy to make generic. The Data.Data module lets us extract the constructor for the Job type, and the list of fields in that constructor. We just make sure that’s an exact match for the list of keys in the JSON object we parsed, and that’s it.

Of course, I’m quite new to the Haskell world so it’s likely there are better ways to do this. Feel free to drop a comment with suggestions! In the mean time, maybe this will be useful to others facing a similar problem.

Update: I’ve fixed parseJSON to properly use fieldLabelModifier from the default options, so that comparison actually works when you’re not using Aeson‘s default options. Thanks to /u/tathougies for catching that.

I’m also hoping to rewrite this in generic form using Generics, so watch this space for more updates.

Quantifying Synchronisation: Oscilloscope Edition

I’ve written a bit in my last two blog posts about the work I’ve been doing in inter-device synchronised playback using GStreamer. I introduced the library and then demonstrated its use in building video walls.

The important thing in synchronisation, of course, is how much in-sync are the streams? The video in my previous post gave a glimpse into that, and in this post I’ll expand on that with a more rigorous, quantifiable approach.

Before I start, a quick note: I am currently providing freelance consulting around GStreamer, PulseAudio and open source multimedia in general. If you’re looking for help with any of these, do get in touch.

The sync measurement setup

Quantifying what?

What is it that we are trying to measure? Let’s look at this in terms of the outcome — I have two computers, on a network. Using the gst-sync-server library, I play a stream on both of them. The ideal outcome is that the same video frame is displayed at exactly the same time, and the audio sample being played out of the respective speakers is also identical at any given instant.

As we saw previously, the video output is not a good way to measure what we want. This is because video displays are updated in sync with the display clock, over which consumer hardware generally does not have control. Besides, our eyes are not that sensitive to minor differences in timing unless images are side-by-side. After all, we’re fooling it with static pictures that change every 16.67ms or so.

Using audio, though, we should be able to do better. Digital audio streams for music/videos typically consist of 44100 or 48000 samples a second, so we have a much finer granularity than video provides us. The human ear is also fairly sensitive to timings with regards to sound. If it hears the same sound at an interval larger than 10 ms, you will hear two distinct sounds and the echo will annoy you to no end.

Measuring audio is also good enough because once you’ve got audio in sync, GStreamer will take care of A/V sync itself.

Setup

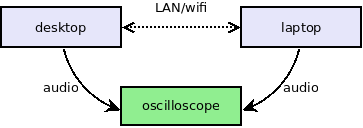
Okay, so now that we know what we want to measure, but how do we measure it? The setup is illustrated below:

Sync measurement setup illustrated

As before, I’ve set up my desktop PC and laptop to play the same stream in sync. The stream being played is a local audio file — I’m keeping the setup simple by not adding network streaming to the equation.

The audio itself is just a tick sound every second. The tick is a simple 440 Hz sine wave (A₄ for the musically inclined) that runs for for 1600 samples. It sounds something like this:

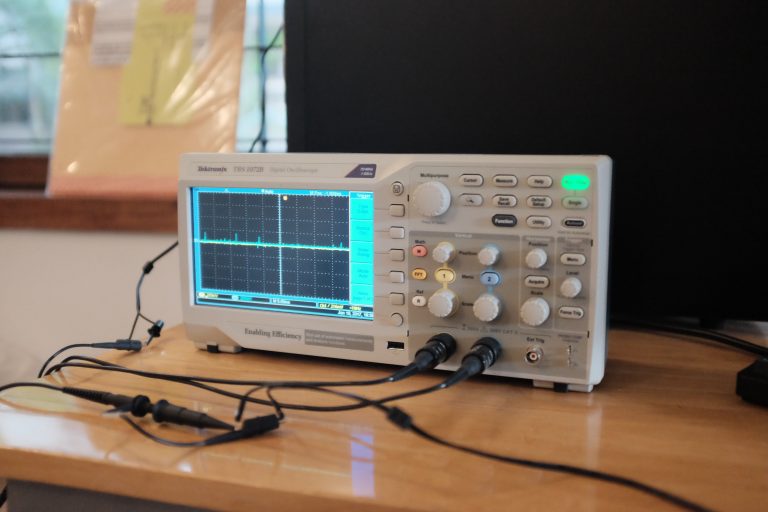
I’ve connected the 3.5mm audio output of both the computers to my faithful digital oscilloscope (a Tektronix TBS 1072B if you wanted to know). So now measuring synchronisation is really a question of seeing how far apart the leading edge of the sine wave on the tick is.

Of course, this assumes we’re not more than 1s out of sync (that’s the periodicity of the tick itself), and I’ve verified that by playing non-periodic sounds (any song or video) and making sure they’re in sync as well. You can trust me on this, or better yet, get the code and try it yourself! :)

The last piece to worry about — the network. How well we can sync the two streams depends on how well we can synchronise the clocks of the pipeline we’re running on each of the two devices. I’ll talk about how this works in a subsequent post, but my measurements are done on both a wired and wireless network.

Measurements

Before we get into it, we should keep in mind that due to how we synchronise streams — using a network clock — how in-sync our streams are will vary over time depending on the quality of the network connection.

If this variation is small enough, it won’t be noticeable. If it is large (10s of milliseconds), then we may notice start to notice it as echo, or glitches when the pipeline tries to correct for the lack of sync.

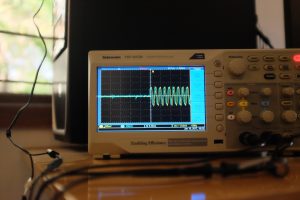
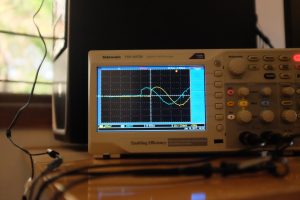
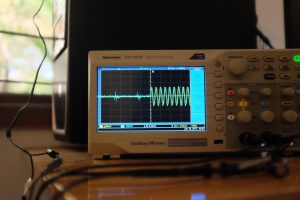
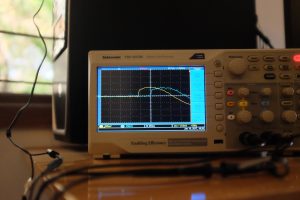
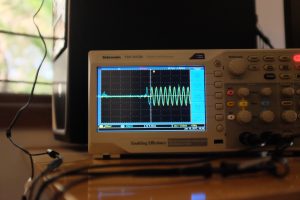
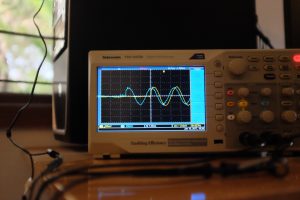
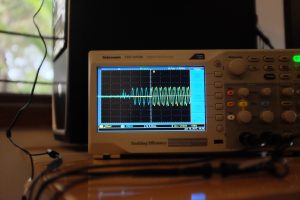
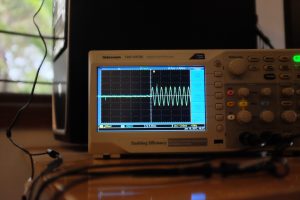
In the first setup, my laptop and desktop are connected to each other directly via a LAN cable. The result looks something like this:

The first two images show the best case — we need to zoom in real close to see how out of sync the audio is, and it’s roughly 50µs.

The next two images show the “worst case”. This time, the zoomed out (5ms) version shows some out-of-sync-ness, and on zooming in, we see that it’s in the order of 500µs.

So even our bad case is actually quite good — sound travels at about 340 m/s, so 500µs is the equivalent of two speakers about 17cm apart.

Now let’s make things a little more interesting. With both my laptop and desktop connected to a wifi network:

On average, the sync can be quite okay. The first pair of images show sync to be within about 300µs.

However, the wifi on my desktop is flaky, so you can see it go off up to 2.5ms in the next pair. In my setup, it even goes off up to 10-20ms, before returning to the average case. The next two images show it go back and forth.

Why does this happen? Well, let’s take a quick look at what ping statistics from my desktop to my laptop look like:

Ping from desktop to laptop on wifi

That’s not good — you can see that the minimum, average and maximum RTT are very different. Our network clock logic probably needs some tuning to deal with this much jitter.

Conclusion

These measurements show that we can get some (in my opinion) pretty good synchronisation between devices using GStreamer. I wrote the gst-sync-server library to make it easy to build applications on top of this feature.

The obvious area to improve is how we cope with jittery networks. We’ve added some infrastructure to capture and replay clock synchronisation messages offline. What remains is to build a large enough body of good and bad cases, and then tune the sync algorithm to work as well as possible with all of these.

Also, Florent over at Ubicast pointed out a nice tool they’ve written to measure A/V sync on the same device. It would be interesting to modify this to allow for automated measurement of inter-device sync.

In a future post, I’ll write more about how we actually achieve synchronisation between devices, and how we can go about improving it.

Synchronised Playback and Video Walls

Hello again, and I hope you’re having a pleasant end of the year (if you are, maybe don’t check the news until next year).

I’d written about synchronised playback with GStreamer a little while ago, and work on that has been continuing apace. Since I last wrote about it, a bunch of work has gone in:

  • Landed support for sending a playlist to clients (instead of a single URI)

  • Added the ability to start/stop playback

  • The API has been cleaned up considerably to allow us to consider including this upstream

  • The control protocol implementation was made an interface, so you don’t have to use the built-in TCP server (different use-cases might want different transports)

  • Made a bunch of robustness fixes and documentation

  • Introduced API for clients to send the server information about themselves

  • Also added API for the server to send video transformations for specific clients to apply before rendering

While the other bits are exciting in their own right, in this post I’m going to talk about the last two items.

Video walls

For those of you who aren’t familiar with the term, a video wall is just an array of displays stacked to make a larger display. These are often used in public installations.

One way to set up a video wall is to have each display connected to a small computer (such as the Raspberry Pi), and have them play a part of the entire video, cropped and scaled for the display that is connected. This might look something like:

A 4×4 video wall

The tricky part, of course, is synchronisation — which is where gst-sync-server comes in. Since we’re able to play a given stream in sync across devices on a network, the only missing piece was the ability to distribute a set of per-client transformations so that clients could apply those, and that is now done.

In order to keep things clean from an API perspective, I took the following approach:

  • Clients now have the ability to send a client ID and a configuration (which is just a dictionary) when they first connect to the server

  • The server API emits a signal with the client ID and configuration, which allows you to know when a client connects, what kind of display it’s running, and where it is positioned

  • The server now has additional fields to send a map of client ID to a set of video transformations

This allows us to do fancy things like having each client manage its own information with the server dynamically adapting the set of transformations based on what is connected. Of course, the simpler case of having a static configuration on the server also works.

Demo

Since seeing is believing, here’s a demo of the synchronised playback in action:

The setup is my laptop, which has an Intel GPU, and my desktop, which has an NVidia GPU. These are connected to two monitors (thanks go out to my good friends from Uncommon for lending me their thin-bezelled displays).

The video resolution is 1920×800, and I’ve adjusted the crop parameters to account for the bezels, so the video actually does look continuous. I’ve uploaded the text configuration if you’re curious about what that looks like.

As I mention in the video, the synchronisation is not as tight than I would like it to be. This is most likely because of the differing device configurations. I’ve been working with Nicolas to try to address this shortcoming by using some timing extensions that the Wayland protocol allows for. More news on this as it breaks.

More generally, I’ve done some work to quantify the degree of sync, but I’m going to leave that for another day.

p.s. the reason I used kmssink in the demo was that it was the quickest way I know of to get a full-screen video going — I’m happy to hear about alternatives, though

Future work

Make it real

My demo was implemented quite quickly by allowing the example server code to load and serve up a static configuration. What I would like is to have a proper working application that people can easily package and deploy on the kinds of embedded systems used in real video walls. If you’re interested in taking this up, I’d be happy to help out. Bonus points if we can dynamically calculate transformations based on client configuration (position, display size, bezel size, etc.)

Hardware acceleration

One thing that’s bothering me is that the video transformations are applied in software using GStreamer elements. This works fine(ish) for the hardware I’m developing on, but in real life, we would want to use OpenGL(ES) transformations, or platform specific elements to have hardware-accelerated transformations. My initial thoughts are for this to be either API on playbin or a GstBin that takes a set of transformations as parameters and internally sets up the best method to do this based on whatever sink is available downstream (some sinks provide cropping and other transformations).

Why not audio?

I’ve only written about video transformations here, but we can do the same with audio transformations too. For example, multi-room audio systems allow you to configure the locations of wireless speakers — so you can set which one’s on the left, and which on the right — and the speaker will automatically play the appropriate channel. Implementing this should be quite easy with the infrastructure that’s currently in place.

Merry Happy .

I hope you enjoyed reading that — I’ve had great responses from a lot of people about how they might be able to use this work. If there’s something you’d like to see, leave a comment or file an issue.

Happy end of the year, and all the best for 2017!

GStreamer and Synchronisation Made Easy

A lesser known, but particularly powerful feature of GStreamer is our ability to play media synchronised across devices with fairly good accuracy.

The way things stand right now, though, achieving this requires some amount of fiddling and a reasonably thorough knowledge of how GStreamer’s synchronisation mechanisms work. While we have had some excellent talks about these at previous GStreamer conferences, getting things to work is still a fair amount of effort for someone not well-versed with GStreamer.

As part of my work with the Samsung OSG, I’ve been working on addressing this problem, by wrapping all the complexity in a library. The intention is that anybody who wants to implement the ability for different devices on a network to play the same stream and have them all synchronised should be able to do so with a few lines of code, and the basic know-how for writing GStreamer-based applications.

I’ve started work on this already, and you can find the code in the creatively named gst-sync-server repo.

Design and API

Let’s make this easier by starting with a picture …

Big picture of the architecture

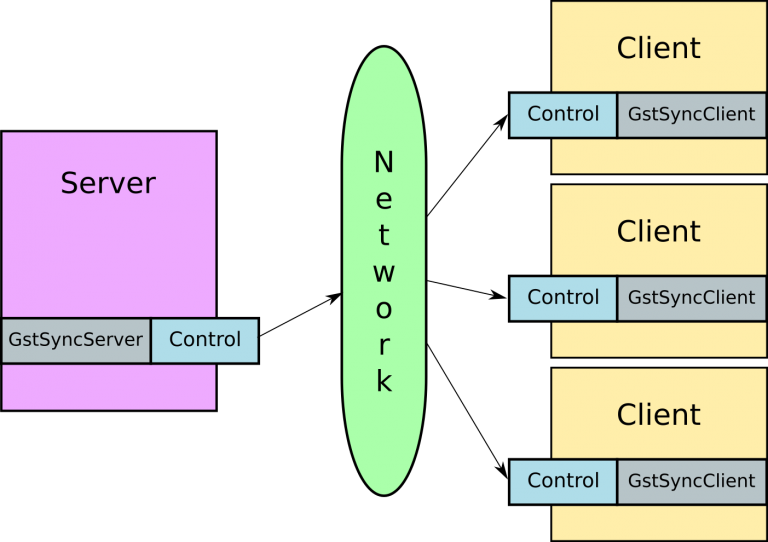
Let’s say you’re writing a simple application where you have two ore more devices that need to play the same video stream, in sync. Your system would consist of two entities:

  • A server: this is where you configure what needs to be played. It instantiates a GstSyncServer object on which it can set a URI that needs to be played. There are other controls available here that I’ll get to in a moment.

  • A client: each device would be running a copy of the client, and would get information from the server telling it what to play, and what clock to use to make sure playback is synchronised. In practical terms, you do this by creating a GstSyncClient object, and giving it a playbin element which you’ve configured appropriately (this usually involves at least setting the appropriate video sink that integrates with your UI).

That’s pretty much it. Your application instantiates these two objects, starts them up, and as long as the clients can access the media URI, you magically have two synchronised streams on your devices.

Control

The keen observers among you would have noticed that there is a control entity in the above diagram that deals with communicating information from the server to clients over the network. While I have currently implemented a simple TCP protocol for this, my goal is to abstract out the control transport interface so that it is easy to drop in a custom transport (Websockets, a REST API, whatever).

The actual sync information is merely a structure marshalled into a JSON string and sent to clients every time something happens. Once your application has some media playing, the next thing you’ll want to do from your server is control playback. This can include

  • Changing what media is playing (like after the current media ends)
  • Pausing/resuming the media
  • Seeking
  • “Trick modes” such as fast forward or reverse playback

The first two of these work already, and seeking is on my short-term to-do list. Trick modes, as the name suggets, can be a bit more tricky, so I’ll likely get to them after other things are done.

Getting fancy

My hope is to see this library being used in a few other interesting use cases:

  • Video walls: having a number of displays stacked together so you have one giant display — these are all effectively playing different rectangles from the same video

  • Multiroom audio: you can play the same music across different speakers in a single room, or multiple rooms, or even group sets of speakers and play different media on different groups

  • Media sharing: being able to play music or videos on your phone and have your friends be able to listen/watch at the same time (a silent disco app?)

What next

At this point, the outline of what I think the API should look like is done. I still need to create the transport abstraction, but that’s pretty much a matter of extracting out the properties and signals that are part of the existing TCP transport.

What I would like is to hear from you, my dear readers who are interested in using this library — does the API look like it would work for you? Does the transport mechanism I describe above cover what you might need? There is example code that should make it easier to understand how this library is meant to be used.

Depending on the feedback I get, my next steps will be to implement the transport interface, refine the API a bit, fix a bunch of FIXMEs, and then see if this is something we can include in gst-plugins-bad.

Feel free to comment either on the Github repository, on this blog, or via email.

And don’t forget to watch this space for some videos and measurements of how GStreamer synchronised fares in real life!

GStreamer on Android and universal builds

This is a quick PSA for those of you using the GStreamer binary builds for Android.

With the Android NDK r12, the default behaviour while building native code changed from building for armeabi to building for all ABIs. So if your app doesn’t specify APP_ABI in its Application.mk, you will now get an error about unsupported architectures. This was tracked as bug 770631.

The idea behind this change is that your Android app should ship versions of your native code for all supported architectures as a “universal” build, so it is accessible to as many devices as possible.

To deal with this, we now provide a universal tarball which contains binaries for all archiectures that we support. This is currently ARM, ARMv7-A, ARMv8-A (64-bit), x86, and x86-64. That leaves MIPS and MIPS64 that are not currently supported.

If you’ve been using the GStreamer Android binaries before GStreamer 1.9.2, then you should start using the universal tarball rather than the architecture-specific tarball. You will need minor updates to your native build, like we made to the player example. You probably want to put the gstAndroidRoot variable in ~/.gradle/gradle.properties instead, though.

As Sebastian announced, assuming all goes well with the universal tarballs, we will stop shipping the per-arch tarballs — they are redundant, and just take up CI and disk resources.

There are some things that I’d like for us to be able to do better. The first is that Android Studio doesn’t pick up native code with our current build approach. This is a limitation of the Android Gradle NDK plugin, which doesn’t support a custom build. This should change with Android Studio 2.2.

I would also like to integrate better with Android Studio — either be able to specify the GStreamer Android binary path in the UI (like you do for the SDK/NDK), or better yet, have it be possible to specify the dependency in Gradle, and have it be automatically pulled from the Internet. If any of you are familiar with how we can do this, please shout out!

Beamforming in PulseAudio

In case you missed it — we got PulseAudio 9.0 out the door, with the echo cancellation improvements that I wrote about. Now is probably a good time for me to make good on my promise to expand upon the subject of beamforming.

As with the last post, I’d like to shout out to the wonderful folks at Aldebaran Robotics who made this work possible!

Beamforming

Beamforming as a concept is used in various aspects of signal processing including radio waves, but I’m going to be talking about it only as applied to audio. The basic idea is that if you have a number of microphones (a mic array) in some known arrangement, it is possible to “point” or steer the array in a particular direction, so sounds coming from that direction are made louder, while sounds from other directions are rendered softer (attenuated).

Practically speaking, it should be easy to see the value of this on a laptop, for example, where you might want to focus a mic array to point in front of the laptop, where the user probably is, and suppress sounds that might be coming from other locations. You can see an example of this in the webcam below. Notice the grilles on either side of the camera — there is a microphone behind each of these.

Webcam with 2 mics

Webcam with 2 mics

This raises the question of how this effect is achieved. The simplest approach is called “delay-sum beamforming”. The key idea in this approach is that if we have an array of microphones that we want to steer the array at a particular angle, the sound we want to steer at will reach each microphone at a different time. This is illustrated below. The image is taken from this great article describing the principles and math in a lot more detail.

Delay-sum beamforming

Delay-sum beamforming

In this figure, you can see that the sound from the source we want to listen to reaches the top-most microphone slightly before the next one, which in turn captures the audio slightly before the bottom-most microphone. If we know the distance between the microphones and the angle to which we want to steer the array, we can calculate the additional distance the sound has to travel to each microphone.

The speed of sound in air is roughly 340 m/s, and thus we can also calculate how much of a delay occurs between the same sound reaching each microphone. The signal at the first two microphones is delayed using this information, so that we can line up the signal from all three. Then we take the sum of the signal from all three (actually the average, but that’s not too important).

The signal from the direction we’re pointing in is going to be strongly correlated, so it will turn out loud and clear. Signals from other directions will end up being attenuated because they will only occur in one of the mics at a given point in time when we’re summing the signals — look at the noise wavefront in the illustration above as an example.

Implementation

(this section is a bit more technical than the rest of the article, feel free to skim through or skip ahead to the next section if it’s not your cup of tea!)

The devil is, of course, in the details. Given the microphone geometry and steering direction, calculating the expected delays is relatively easy. We capture audio at a fixed sample rate — let’s assume this is 32000 samples per second, or 32 kHz. That translates to one sample every 31.25 µs. So if we want to delay our signal by 125µs, we can just add a buffer of 4 samples (4 × 31.25 = 125). Sound travels about 4.25 cm in that time, so this is not an unrealistic example.

Now, instead, assume the signal needs to be delayed by 80 µs. This translates to 2.56 samples. We’re working in the digital domain — the mic has already converted the analog vibrations in the air into digital samples that have been provided to the CPU. This means that our buffer delay can either be 2 samples or 3, not 2.56. We need another way to add a fractional delay (else we’ll end up with errors in the sum).

There is a fair amount of academic work describing methods to perform filtering on a sample to provide a fractional delay. One common way is to apply an FIR filter. However, to keep things simple, the method I chose was the Thiran approximation — the literature suggests that it performs the task reasonably well, and has the advantage of not having to spend a whole lot of CPU cycles first transforming to the frequency domain (which an FIR filter requires)(edit: converting to the frequency domain isn’t necessary, thanks to the folks who pointed this out).

I’ve implemented all of this as a separate module in PulseAudio as a beamformer filter module.

Now it’s time for a confession. I’m a plumber, not a DSP ninja. My delay-sum beamformer doesn’t do a very good job. I suspect part of it is the limitation of the delay-sum approach, partly the use of an IIR filter (which the Thiran approximation is), and it’s also entirely possible there is a bug in my fractional delay implementation. Reviews and suggestions are welcome!

A Better Implementation

The astute reader has, by now, realised that we are already doing a bunch of processing on incoming audio during voice calls — I’ve written in the previous article about how the webrtc-audio-processing engine provides echo cancellation, acoustic gain control, voice activity detection, and a bunch of other features.

Another feature that the library provides is — you guessed it — beamforming. The engineers at Google (who clearly are DSP ninjas) have a pretty good beamformer implementation, and this is also available via module-echo-cancel. You do need to configure the microphone geometry yourself (which means you have to manually load the module at the moment). Details are on our wiki (thanks to Tanu for that!).

How well does this work? Let me show you. The image below is me talking to my laptop, which has two microphones about 4cm apart, on either side of the webcam, above the screen. First I move to the right of the laptop (about 60°, assuming straight ahead is 0°). Then I move to the left by about the same amount (the second speech spike). And finally I speak from the center (a couple of times, since I get distracted by my phone).

The upper section represents the microphone input — you’ll see two channels, one corresponding to each mic. The bottom part is the processed version, with echo cancellation, gain control, noise suppression, etc. and beamforming.

WebRTC beamforming

WebRTC beamforming

You can also listen to the actual recordings …

… and the processed output.

Feels like black magic, doesn’t it?

Finishing thoughts

The webrtc-audio-processing-based beamforming is already available for you to use. The downside is that you need to load the module manually, rather than have this automatically plugged in when needed (because we don’t have a way to store and retrieve the mic geometry). At some point, I would really like to implement a configuration framework within PulseAudio to allow users to set configuration from some external UI and have that be picked up as needed.

Nicolas Dufresne has done some work to wrap the webrtc-audio-processing library functionality in a GStreamer element (and this is in master now). Adding support for beamforming to the element would also be good to have.

The module-beamformer bits should be a good starting point for folks who want to wrap their own beamforming library and have it used in PulseAudio. Feel free to get in touch with me if you need help with that.

Improvements to PulseAudio’s Echo Cancellation

As we approach the PulseAudio 9.0 release, I thought it would be a good time to talk about one of the things I had a chance to work on, that landed in this cycle.

Old-time readers will remember the work I had done in the past on echo cancellation. If you’re unfamiliar with the concept, imagine a situation where you’re making a call from your phone or laptop. You don’t have a headset, so you use your device’s speaker and microphone. Now when the person on the other end speaks, their voice is played out of your speaker and captured by your mic. This means that they can now also hear what they’re saying, with some lag — this is called echo. If this has happened to you, you know how annoying and disruptive it can be.

Using Acoustic Echo Cancellation (AEC), PulseAudio is able to detect this in the captured input, and remove the audio we recently played back. While doing this, we also run some other algorithms to enhance the captured input, such as noise suppression (great at damping out background and fan noise) and acoustic gain control, or AGC, which adjusts the mic volume so you are clearly audible). In addition to voice call use cases, this is also handy to have in other applications such as speech recognition (where you want the device to detect what a user is saying, while possibly playing out other sounds).

We don’t implement these algorithms ourselves in PulseAudio. The echo cancellation module — cunningly named module-echo-cancel — provides the infrastructure to plug in different echo canceller implementations. One of these that we support (and recommend), is based on Google’s [WebRTC.org] implementation which includes an extremely capable set of voice processing algorithms.

This is a large code-base, intended to support a full real-time communication stack, and we didn’t want to pick up all that code to include in PulseAudio. So what I did was to make a copy of the AudioProcessing module, wrap it in an easy-to-package library, and then used that from PulseAudio. Quite some time passed by, and I didn’t get a chance to update that code, until last October.

What’s New

The update brought us a number of things since the last one (5 years ago!):

  • The AGC module has essentially been rewritten. In practice, we see that it is slower to change the volume.

  • Voice Activity Detection (VAD) has also been split off into its own module and undergone significant changes.

  • Beamforming has been added, to allow you to use a set of microphones to be able to “point” your microphone array in a specific direction (more on this in a later post).

  • There is now an intelligibility enhancer for applying processing on the stream coming in from the far end (so you can hear the other side better). This feature has not been hooked up in PulseAudio yet.

  • There is a transient suppressor for when you’re on a laptop, and your microphone is picking up keystrokes. This can be important since the sound of the keystroke introduces sharp spikes or “transients” in the audio stream, which can throw off the echo canceller that works best with the frequency range of the human voice. This one seems to be work-in-progress, and not actually used yet.

In addition to this, I’ve also extended support in module-echo-cancel for performing cancellation on multiple channels. So we are now able to deal with hardware that has any number of playback and capture channels (and they don’t even need to be equal), and we no longer have the artificial restriction of having to downmix things to mono.

These changes are in the newly released webrtc-audio-processing v0.2. Unfortunately, we do break API with regards to the previous version. I wrote about this a while back, and hopefully the impact on other users of this library will be minimal.

All this work was made possible thanks to Aldebaran Robotics. A special shout-out to Julien Massot and his excellent team!

These features are already in our master branch, and will be part of the 9.0 release. If you’re using these features, let me know how things work for you, and watch out for a follow up post about beamforming.

If you or your company are looking for help with either PulseAudio or GStreamer, do take a look at the consulting services I currently provide.

Audio Devices and Configuration

This one’s going to be a bit of a long post. You might want to grab a cup of coffee before you jump in!

Over the last few years, I’ve spent some time getting PulseAudio up and running on a few Android-based phones. There was the initial Galaxy Nexus port, a proof-of-concept port of Firefox OS (git) to use PulseAudio instead of AudioFlinger on a Nexus 4, and most recently, a port of Firefox OS to use PulseAudio on the first gen Moto G and last year’s Sony Xperia Z3 Compact (git).

The process so far has been largely manual and painstaking, and I’ve been trying to make that easier. But before I talk about the how of that, let’s see how all this works in the first place.

Read More

A Quick Update

Happy 2016 everyone!

While I did mention a while back (almost two years ago, wow) that I was taking a break, I realised recently that I hadn’t posted an update from when I started again.

For the last year and a half, I’ve been providing freelance consulting around PulseAudio, GStreamer, and various other directly and tangentially related projects. There’s a brief list of the kind of work I’ve been involved in.

If you’re looking for help with PulseAudio, GStreamer, multimedia middleware or anything else you might’ve come across on this blog, do get in touch!

PulseAudio 7.1 is out

We just rolled out a minor bugfix release. Quick changelog:

  • Fix a crasher when using srbchannel
  • Fix a build system typo that caused symlinks to turn up in /
  • Make Xonar cards work better
  • Other minor bug fixes and improvements

More details on the mailing list.

Thanks to everyone who contributed with bug reports and testing. What isn’t generally visible is that a lot of this happens behind the scenes downstream on distribution bug trackers, IRC, and so forth.